Questions?

Canvas offers 24/7 support for DKU faculty, students, and staff. You can access self-help options and links to Canvas Support’s email address and live chat service (a real person from Canvas will help you) from the Help button at the bottom of the Canvas left navigation bar anytime, anywhere.

About the transition from Sakai to Canvas

Much of the content from Sakai sites can be migrated to Canvas by Duke Learning Innovation staff on a by-request basis. You may request up to five Sakai sites at a time to be migrated by the Canvas team for you.

Some items to note about migrations:

  • Migrated sites names in Canvas will start with “MIGRATED_”. 
  • These sites will be separate from your Canvas sites students are officially enrolled in.
  • Not all content is migrate-able to Canvas. Tools which don’t have a Canvas equivalent or are mainly composed of student data are not migrated. 
  • We recommend reviewing our Migration Map document which breaks down each tool’s migrate-able content and settings in detail. 
  • If any content needs to be altered during the migration due to differences between Sakai and Canvas, a Change Log Page will be created in the Pages tool in the migrated site. Look for the pages with emojis in the titles (e.g., ⚠️ Quiz Change Log | IMPORTANT).
  • Migrated sites cannot be used with students or other users. Migrated sites are for you to review and update content as needed. You should thoroughly review ALL aspects of your migrated site, and update as needed. 
  • When you are ready to use the content in a real course or collaboration site, you may copy all or part of the contents into your real site following the steps in this guide.
  • If you encounter an issue with a migrated site (for example, a missing file), please report this to lmstransition@duke.edu

Due to limitations on Canvas’ side, the migration tool is not able to recreate Sakai question pools as Canvas question banks. If a quiz in Sakai had questions from a question pool, those questions will not display in the migrated version of the quiz in Canvas. Instead a new quiz with the question pool’s name will be created and all questions in the question pool will be added. This is being done so that all questions from used question pools in Sakai are available in Canvas. An instructor may then choose to reuse these questions in another way, create question banks directly in Canvas or another alternative. If you need assistance with question banks in Canvas, you may contact CTL (dku_ctl@dukekunshan.edul.cn).

All your Sakai sites will be accessible until June 2025 but in a “read-only” mode starting in Summer 2024. See the timeline here.

The equivalent to project sites in Canvas will be Collaboration Sites. DKU users are able to use Canvas collaboration sites now. You have to submit a request to Duke for a blank collaboration site or a Sakai project site migrated to a Canvas collaboration site via this Collaboration Site Request Form. All requests will be evaluated by Duke and all approved collaboration sites will be created by Duke. Find more details and resources on this webpage.

Access and enrollment

All course sites will be created automatically in Canvas when the course information is released from the DKUHub or DukeHub to Canvas.

  • As an instructor, you usually see the courses for next term in Canvas when the Registrar opens these courses for registration and releases course information to Canvas. Contact the Registrar office for the exact date.

  • As a student, you will see your course in Canvas when the instructor publishes the course site. It may take up to 4 hours for the enrollment to take effect in Canvas. If you still do not see your course in Canvas after 4-6 hours, contact your instructor whether the course site is published.

Canvas syncs enrollment adds, drops, and waitlists from DukeHub and DKUHub. Enrollment changes in DukeHub/DKUHub should be reflected in Canvas within 4-6 hours. 

Waitlisted students will remain in Canvas sites until the end of the add/drop period. At the end of the add/drop period, if the student is still on the waitlist, they will be removed from the Canvas site.

Any person not on the DKUHub/DukeHub roster will need to be manually added to the Canvas site via the People tool. 

Instructors should be able to see courses in Canvas as soon as they are released from DKUHub or DukeHub to Canvas. Check with the DKU Registrar about the exact release date. But if the course should be in Canvas, but you still cannot see it in Canvas Dashboard:

  • Check if you are listed as the instructor of the course in DKUHub or Dukehub.

  • Check under “Courses” tab on the left navigation bar, then click “All Courses”. You probably need to click the star of your course to make it appear in the Dashboard.

Old Canvas sites associated with an official course listed in DukeHub/DKU Hub will go into a “concluded state” 21 days after the official end of the term. This means that the site turns into read-only for all users enrolled in the site (including instructors). This is done so the state of the site is preserved and not altered by accidental changes, late submissions, etc. Concluded sites are removed from users’ dashboards but remain accessible via the Courses > All courses link. 

There are two reasons you may see differences between the enrollment list in Canvas and DukeHub. 

First, just as in Sakai, waitlisted students are included in the Canvas course site rosters until the end of add/drop. Your Canvas roster before the end of the add/drop deadline should be the sum of your officially enrolled and waitlisted students in DukeHub. After the add/drop deadline, any students remaining on the waitlist will be removed from the Canvas site.

If you are seeing students in Canvas who aren’t enrolled or on the waitlist in DukeHub (i.e., if they have dropped the course but are still in the Canvas site more than 4 hours after they dropped), please contact service-desk@dukekunshan.edu.cn 

In Canvas, combining sections of a course is called “Cross-listing.” This is straightforward for faculty members to do themselves following this help guide. This is for two course sections with the same instructor.

If you need to combine multiple sections in one course site with multiple instructors, follow these steps:

For example, section 001 with Instructor A and 003 with Instructor B, they use course site 001 for teaching

  1. Instructor A of 001 adds the other instructor B to the 001 site as “teacher”: Go to 001 site “People” tab, add Instructor B using the DKU email.

  2. Instructor B goes to course site 003 to do “cross-listing”:

    • Go to the site 003, click “Settings” on the left menu bar
    • Click “Sections”
    • Click into the 003 section blue link
    • Click “Cross-List this Section” button on the right side
    • Find the 001 section and finish the process.

Yes – instructors may access Canvas using the free Canvas Teacher App on mobile devices.

For iOS users:

For Android users:

Once you have downloaded the app:

  • Open the app, and either click ‘Find my school’ or use the QR code in your Canvas account to login through your phone
  • If using ‘Find my school’, search for ‘Duke University’
  • Use your NetID and password to login

Sites associated with an official course listed in DukeHub/DKU Hub will go into a concluded state 21 days after the official end of the term. A concluded state means that the site turns into read-only for all users enrolled in the site (including instructors). This is done so the state of the site is preserved and not altered by accidental changes, late submissions, etc. Concluded sites are removed from users’ dashboards but remain accessible via the Courses > All courses link.

If you want to share content in a concluded course with colleagues, please choose one of two methods below:

  • Share individual materials: Direct Share
  • Copy over your concluded course site to your Sandbox site (see above) and add your colleagues to your Sandbox site so that they can view. If you need additional sandboxes, please email CTL.


Note: Sandbox & Collaboration sites are not dictated by the same controls by default as they are not associated with a specific term.

Setting up course site and content

On your Canvas course site, there are some links (Home, Announcement, Modules, Grades, and DKU Library) enabled by default in the Course Navigation. But if you want to customize your Course Navigation by adding or removing links, you can

  1. Go to Settings in Course Navigation
  2. Select “Navigation”
  3. Drag and move the tool(s) you want to add or remove
  4. Click “Save”


For more details, please see How do I manage Course Navigation links?

Yes. All DKU users are recommended to change their personal time zone preference to China Time. See this documentation for detailed steps. All DKU courses use the China Time as the default time zone.

Instructors can copy content from an existing Canvas site to another including course settings, syllabus, assignments, modules, files, pages, discussions, quizzes, and question banks. You can also copy or adjust events and due dates. Student work cannot be copied over to the new course. Find out detailed instructions here.

Students should be able to see courses in their Canvas Dashboard as soon as they are published by the instructors. If the course is published, but the student still cannot see it in Canvas Dashboard:

  • Check if the student is properly enrolled in the course in DKUHub or Dukehub.

  • Check under “Courses” tab on the left navigation bar, then click “All Courses”. Students need to click the star of the course to make it appear in the Dashboard.

Readings, assignments, quizzes, modules, discussions and other content need to be published by the instructor before students can see them. Note the green check will appear when the content is published. The tool that the content reside in also need to be visible to students so that they can see the content.

Similar to Resources in Sakai, Files in a course site can house documents that you would like to share with students. Instructors can lock folders and files so that they can only be viewed by direct links or only unlock on a specific date.

However, all course files are automatically stored there as well. For example, any images that you have used to create a page or a quiz will be stored in Files. We strongly recommend that you keep the “Files” tool hidden from students in the course navigation.

Canvas accommodates a few different types of videos, such as Warpwire, Panopto, and YouTube videos. Instructors are highly recommended to upload home-grown videos to Warpwire or Panopto before sharing with students in Canvas. Canvas sites don’t have enough space to store large videos.

  • Youtube videos: The best way to share a YouTube video in Canvas is to embed it in a page so that the viewers can simply click to play it. You need to use the Rich Content Editor to do it. It’s available in pages, discussions, announcements, and most tools with an “EDIT” button. See instructions here.

  • Warpwire videos: If you store all videos in Warpwire, you may add Warpwire tool to the course left navigation menu for easy access. Go to Settings » Navigation to enable the “Warpwire” tool. The other option is to add an individual video from Warpwire via the Rich Content Editor “Apps” button.

  • Panopto videos: Panopto is integrated to Canvas, too.

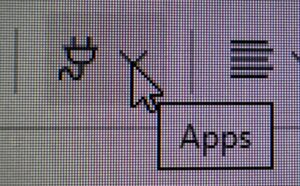
    • To share a video, navigate to any tool that uses the Rich Content Editor. (e.g., Pages, Assignments, Discussions). Choose Panopto when you View all Apps in the Rich Content Editor to embed your video.

    • To access Panopto in Course Navigation: In Settings > Navigation, select the “Panopto Video” tool and Enable it. Course participants can now use the Panopto Video option in the course navigation to view the course folder.

  • PlayPosit videos: PlayPosit is also integrated in Canvas, just differently.

    • To share a PlayPosit video, navigate to any tool that uses the Rich Content Editor. (e.g., Pages, Assignments, Discussions). Choose PlayPosit when you View all Apps in the Rich Content Editor to embed your video.

    • The second method is in the Modules tool. Click the “+” button under a module, find “external tools” under the dropdown menu, you can find “PlayPosit” in the list.

Read this Options for Hosting Videos in Canvas by Duke.

People and communication

Instructors can add TAs, audit students, and co-instructors to a Canvas site by going to the “People” tool. You do not have to add enrolled students to your site manually. See here about how to use the “People” tool.

Note: Your TA/RA or visitor needs to log into Canvas at least once to activate the account before you can find the name.

If you need to add someone not at Duke to your Canvas site, there are two options:

  1. Create a Duke Sponsored Account for that person. Typically this would be done if the person needs access to other Duke resources in addition to Canvas, or if they might need access on an ongoing basis beyond one semester.

    • Complete the appropriate form linked from the site above.

    • After the sponsored account is created, ask the person to login to Canvas. This will create their Canvas account.

    • After the Canvas account is created, in your site, use the People tool to add the person in the desired role.

  1. Have the person create/register a OneLink login. OneLink is a service that allows alumni and others to sign in to select Duke systems.

    • Ask the person to complete registration of a OneLink account. During the process, a Duke Unique ID (DUID) will be created for the person.

    • After their OneLink account is created, ask the person to log in to Canvas. This will create their Canvas account.

    • After the Canvas account is created, in your site, use the People tool to add the person, using their DUID, in the desired role.

Announcement notifications will be sent to student’s email inbox automatically by default. If instructors want to opt in to receive such notifications to be sure, you can enable it by going to your personal account notification setting and turn on the option “Announcement Created By You”. Find out more about notification settings here.

You can use the Calendar “Appointment Group” feature to set up office hour appointments for your students in a course. Be careful with the courses and the groups your appointments open to. See detailed guide here.

There are some permissions you can manage at the course level for your TAs. For example:

  • You can restrict TAs to only seeing one section of a cross-listed course
  • You can enable anonymous grading so TAs cannot see what student they are grading for. 

TAs Can:

  • Create and Manage All Course Materials INCLUDING deleting them
  • Manually add students to a course
  • Message students individually or in groups
  • Manage items in the course calendar
  • View and edit grades
  • View and edit question banks

TAs Cannot:

  • Create, edit, or delete student groups (or sections)
  • Submit work on behalf of students
  • Submit final grades

For more information on what TAs can and cannot do see this webpage.

Assessments in Canvas

In the Assignment settings, there is an Availability setting “Available from… until…”. The date for “Available from …” is the starting time when the assignment appears on the student’s interface. The date for “until…” is the end time for students to see the assignment instructions, submission interface, and the released feedback for this assignment. It is NOT the same as the “due time” of this assignment. Instructors are advised to leave this “until…” setting blank. Find more details here.

Some instructors prefer to download all students’ submissions to grade on their computers or as print-outs, instead of using the Canvas Speed Grader. There’s an easy to do that just by one-click. Find the “Download Submissions” button on the assignment’s page or in the Grades. See detailed instructions and screenshots here.

When adding a rubric to an assignment, you can see rubrics in all the courses you have access to. Therefore, if you want to share your rubric with other instructors, enroll them in your course so that they can see the rubric in your course. Find instructions here.

The other option is to share the rubric in the institutional level so that all instructors at DKU can see and use it. If this is what you want to explore, contact CTL (dku_ctl@dukekunshan.edu.cn).

All DKU course sites in Canvas are created with the DKU course template. By default, it adopts the DKU UG grading scheme as below, which is recommended.

A+= 100% – 98%; A = 97% – 93%; A- = 92% – 90%; B+ = 89% – 87%; B = 86% – 83%; B- = 82% – 80%; C+ = 79% – 77%; C = 76% – 73%; C- = 72% – 70%; D+ = 69% – 67%; D = 66% – 63%; D- = 62% – 60% F = 59% and below

Please note: the current scheme set in the Canvas course template rounds down the grade; that means, 97.9% will be converted to A.

Instructors can modify this grading scheme in line with your syllabus by going to Settings » Course Details » Grading Scheme. Graduate course instructors can apply a different graduate grading scheme as you see fit.

Turnitin Feedback Studio is integrated in all DKU course sites under the DKU sub-account. It’s a two-step process to create a Turnitin Feedback Studio assignment in a Canvas course site.

  1. Go to the “Assignments” tool, then click the three-dot icon on the top right corner, you will see the “Turnitin” link. Click “Turnitin” to start creating an assignment as usual. It’d be easily for management to use a descriptive name such as “Turnitin assignment – Essay 01”.

  2. The Assignments tool is usually set to be invisible to students, so you need to add the Turnitin assignment link in Modules. Go to Modules, then click the plus button in one of the modules to insert the “Turnitin assignment – Essay 01” in this module.

Gradescope is integrated in all DKU course sites under the DKU sub-account. It’s a two-step process to create a Gradescope assignment in a Canvas course site.

  1. Go to the “Assignments” tool, then click the three-dot icon on the top right corner, you will see the “Gradescope” link. Click “Gradescope” to link to your course and start creating an assignment as usual. It’d be easily for management to use a descriptive name such as “Gradescope assignment – HW 1”.

  2. The Assignments tool is usually set to be invisible to students, so you need to add the Gradescope assignment link in Modules. Go to Modules, then click the plus button in one of the modules to insert the “Gradescope assignment – HW 1” in this module.

For more information about Gradescope in Canvas, see Using Gradescope with Canvas as an Instructor

Please note that the time zone in Gradescope is Eastern Time (US and Canada) by default and there is no way to change it.

For students to see their grades, the grades have to be “posted”. In the Grades tool, if there is a Visibility icon that looks like a crossed-over eye in front of the assignment title, the grades are not visible to the students. You can post grades for an assignment following this guide.

Learn more about managing grade visibility here.

Canvas gradebook is not linked to the DKUHub or DukeHub at the moment. You need to manually enter the final letter grades in DKUHub or DukeHub. Contact the Registrar office about using DKUHub or DukeHub.

For more FAQs, please visit the Duke FAQ page.